Friday, August 18, 2006

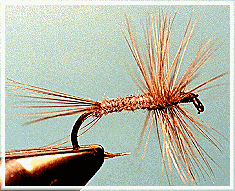
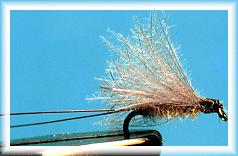
The Adams

The Adams is probably the most popular dry fly of all time. It might be the simple name that draws people to this fly, but I would bet it is results that keep them coming back. This is one very productive fly. It matches most mayfly hatches well enough to work most of the time, and it can be tied in any variety of sizes to fit most needs.

You already have the skills to tie a regular Adams, except you haven’t wrapped two hackles on the same fly yet, and that’s how the Adams is tied. It isn’t hard to wrap two hackles on one fly (or four for that matter), you just have to try it to know you can do it. We will also tie our first hair tail and learn another method of tying hackle tip wings to a hook. See, we’re learning something new every week.

I mentioned several weeks ago that the hackle floats the fly by resting on the surface tension of the water. If you increase the amount of hackle on a fly, you can fish it in faster water because of the increased buoyancy created by the extra hackle in contact with the surface tension of the water.

Many “western” flies have more hackle on them than their eastern counterparts because western waters tend to be faster on average than eastern waters. Many of the flies I tie have a decidedly western “flavor” in that they are heavier hackled than those used in calmer waters.

As we progress from the Adams to the Royal Wulff (later) and the Humpy (even farther away) you will notice the heavier hackle on these western style flies. If you live in an area that has calm water, you might find these heavier hackled flies a bit “thick” for your water. Don’t give up yet, most patterns can be adapted to any type of water by tying them with more or less hackle.

If you feel you need to adapt this or any fly to a calmer type of water, just extend the body slightly, and wrap less hackle on a shorter portion of the hook shank. That means less hackle wraps, and a fly that floats in slow water but would sink in fast water. That wasn’t too hard was it?

Of course, some flies were designed for fast water, and adapting them to slow water would be a disaster. Wulff, Humpy and Stimulator patterns must have heavy hackle to look or perform right, and therefore are specialty flies designed for fast water. Likewise, some flies were designed for slow water, (Catskill dry flies for example) and adding hackle to them to increase the floatation qualities of the fly would be grounds for expulsion from the ranks of purist Catskill fly fishing clubs.

The Adams is one fly that can be adapted to almost any type of water. It can also be tied as a thorax fly with various types of wing material, and several types of tails. If you’re like me, you won’t be content to merely tie the traditional dressing, but would rather experiment a little with the skills you have learned to this point. You might also want to tie this fly in some heavy hackled versions for riffles and pocket water, and some lightly hackled versions for calmer water.

Experiment with different types and colors of body materials and wing materials. It won’t be an Adams anymore, but it will probably catch fish. That’s the beauty of tying your own flies, you can create, modify, alter, adjust and refine any pattern you wish, and still use the same basic tying steps you would use on another fly.

Let’s get to this week’s pattern. If you don’t have the right hackle for this pattern, use the hackle you have with the same tying steps as a form of practice. For instance, if you use dun hackle and wings, you simply create a Gray Dun instead of an Adams.


List of materials: The Adams


Hook: Standard dry fly; Mustad 94840, Tiemco 100, Eagle Claw L059, Daiichi 1180. Size 10 - 22.
Thread: 6/0 to 10/0 Gudebrod or equivalent, color to match body or black.


Body: Angler’s Choice pure silk dubbing, muskrat under-fur, or any other synthetic or natural fine dubbing.


Wing: Grizzly hackle tips from spade hackles or the hackle found at the top of the neck. Hen hackle tips also work well. Length of the wing should be about 1 1/2 times the hook gap.


Hackle: Quality neck or saddle hackle, webby parts removed and 1/16” of the remaining stem stripped of barbules. One grizzly and one brown hackle. (Be careful to match the length of the barbules of the hackle feathers.)

Thursday, August 10, 2006

Northwest Fly Patterns & Tying Guide

"The charm of fishing is that it is elusive but attainable. A perpetual series of occasions for hope." - John Buchan

by Rainland Fly Casters
Frank Amato Publications, Inc.
Portland, OR, 2002
83 pages, softbound
illustrated, color
suggested price $29.95
reviewed by Bruce E. Harang

If you fish, or are interested in fishing, the Pacific Northwest this book will provide you with a sound selection of flies to help bring success. Written by members of the fly-fishing club located in Astoria, Oregon these folks know the Pacific Northwest fly fishing scene as well as anyone can.

The book is divided into seven chapters by fly type. These include dry flies, wet flies, nymphs, terrestrials, streamers, and saltwater flies. Each chapter starts with a short discussion of the type of fly and how to fish them, followed by a selection of fly patterns having both an excellent photo and concise recipe. The writing and editing are superb. The photos by Jim Schollmeyer, Rick Newton and Frank Amato are of excellent high quality. The selection will provide the fly fisherman with a winning box of flies for anywhere in the area from the salt to the varied lakes and streams. It is a first rate regional fly pattern book. This selection includes many patterns developed in the area by local fly fishermen, such as Lee Clark’s Stonefly, Henry Hoffman’s Chickabou Crayfish and Articulated Leech, and Colleen Hansen’s 4th of July Shad Fly

But the best part, and the part that sets it on a plane by itself is the last chapter called appropriately enough “Club Members’ Favorite Flies”. This very personal section written by top-flight fly tyers and fly fishermen of the Club provides a wonderful insight and personal relationship between the reader and the authors. Some of these folks are well known in the fly-fishing area, others are only well known to their local peers, but everyone one of them is both very knowledgeable and very willing to share their hard-earned knowledge with any reader willing to learn.

This book is well done, has valuable information, and the personal insights of some of the most knowledgeable fly tyers and fly fishermen in the area. If you are interested in learning about the flies that really catch fish in the Pacific Northwest this is a must have book.

I hope that you enjoy the book!
Ron


  • Buy Book
  • Tuesday, August 08, 2006

    The Nor-Vise By Norlander

    This is a great review on the Nor-Vise By Norlander
    Take it from a Professional Fly Tier Danny Sauvageau, fly tier for 27 years.
    Danny is the owner of Dan's Custom Saltwater Flies. He makes the highest quality flies you can find anywhere. He makes flies for top Pro Fishing Guides in Florida and has won many fly tying contest with his unique flies, and fly tying techniques. "The Nor-Vise by Norlander is the best vise I have ever used! I can use any vise that I want to and the NorVise beats them all easily. No other vise can do all that my Nor-Vise can do. I am very hard on my vise, and this vise has been through the test and still turning flies out by the thousands. I tie saltwater flies and really put this vise though a work out.
    You can feel the craftsmanship of this vise the very first time you feel it." 100% AMERICAN MADE "Speed is very important to me, I need to have tools that can utilize my time so I can keep my prices down and my quality high. The "spinning" ( not just rotating, but Spinning ) action of this vise saves me time and I love the four positions that the vise lock into. It stops at an upright, upside down, and at 90* each way, so you can tie you fly upright, turn it upside down, of lay it on either of it's sides to get very accurate flies.
    The Nor-Vise is a true rotary designed and built to last the serious tier several lifetimes. Unlike other rotary vices, the Nor-Vise does more than simply rotate the fly for convenience. It applies rotary motion and can spin the hook to provide a unique tying method. Once you tie flies on the NorVise, you'll wonder how you ever did without it.
    * Brain-child of professional engineer Norm Norlander, the Nor-Vise blends space-age aluminum and stainless steel with old-time American craftsmanship. It looks and feels right.
    * The bearings are rated for 10,000 hours at 6,000 RPM - so it should last awhile.
    * Using precision-machined offset stainless steel jaws, the Nor-Vise any size fly hook from 6/0 to 28 so tightly you can bend it like a pretzel. The jaws position the hook so its shank lies in the centerline of rotation.
    * Using the Nor-Vise's unique rotary motion and working with the thread post supplied, you can build up hard-to-tie fly patterns quickly, without resorting to endless half-hitches to secure your materials.
    * Many experienced users say that the Nor-Vise is better for dubbing than anything they've ever seen. The vise's rotary motion lets you spin all kinds of dubbing materials directly to the tying thread without the use of excessive bad language, dubbing wax of forming a thread loop.
    * Like a spinning wheel, the Nor-Vise allows you to vary the amount, shape and the texture of the dubbing. Forming neatly tapered fly bodies is a snap.
    * Lead wire spins onto the hook with no overlaps in half the time you could do with the old-fashioned vices.
    * Delicate bode materials like peacock herl can be easily entwined with the working thread to make the toughest neatest flies you've ever handled.
    Happy Tying
    Ron 


  • Basspro.com
  • Saturday, August 05, 2006

    Book Review: Rod Rage; The Ultimate Guide to Angling Ethics


    Much of the present day writings are simply repetitions of the accumulated experiences and thoughts of our forebears, especially writings about fly fishing. Today's writers often restate the knowledge they acquired through reading the older books and articles, never crediting the earlier authors.When one comes across a book that actually quotes the writings of the earlier authors it is to be treasured. Rhea Topping's Rod Rage: The Ultimate Guide to Angling Ethics is such a one. She had the honesty to quote rather than paraphrase her predecessors' works.Ms Topping has searched the literature of fly fishing from the 15th Century's Dame Juliana Berners to the 21st Century's Federation of Fly Fishers' Chairman of the Board Gary Grant to find the best thinking about fly fishing ethics and etiquette. She has quoted often lengthy passages and complete articles from writings of more than sixty authors, many of the names well known in fly fishing circles.In compiling Rod Rage Ms Topping has not just accumulated other writers' work.
    She has written short insightful introductions to each author and closes the book with a summation of much of the thinking of the quoted authors. The final chapter "Some Dos, Don'ts, and Solutions" cover such problem areas as "Crowding: The Biggest Problem", "Respect for Other Anglers", "Some Options for Fishing in Crowds or With Friends", "On Rights-of-Way", "On the Environment", "On the Law", "On Boats", "The Client's Responsibility to the Guide", and "The Guide's Responsibility to the Client".The book is illustrated with black and white photos and cartoons of some of the good and bad ethical situations as well as photos of many of the quoted authors.In her "Afterword" Ms Topping wrote, "In my opinion, etiquette is far more important today than teaching students to cast effectively, to read water, to tie good knots, to catch fish. For in this ever-more-crowded world of fly fishing, if we forget our 'water manners,' it's all lost."Rod Rage ought to be required reading for any fly fisher who goes to a creek, river, lake, pond, estuary, flats, or blue water to enjoy the sport of angling without spoiling the sport of others. Rhea Topping is to be commended for compiling the thinking of these authors as "The Ultimate Guide to Angling Ethics" for us.
  • Buy Book


  • Thursday, August 03, 2006

    Turkey Flats


    How are your tying skills coming along? Do you realize how far you’ve progressed since we started this series? Hopefully you’ve been practicing enough so that each new challenge is easier than you thought it would be. This session, we’ll start with something familiar and progress to a new challenge.

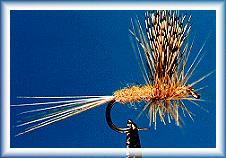
    We’ve already tied a standard dry fly, split tails a couple of ways and tied a thorax fly. What if we tied a fly that has a split tail, hackle trimmed like a thorax fly and a thorax fly wing, but positioned the wing and hackle closer to the front of the hook like it is in a standard dry fly? Would that be considered unconventional? Of course it would, but then again, I’m a little unconventional anyway, so let's do it.

    If you look at a real mayfly, you’ll notice that in some species of mayflies, the wings are attached forward of the regular attachment point for a conventional thorax pattern.

    I guess I prefer to match the hatch more than I prefer to be conventional. Our first fly this week is an unconventional twist on the conventional thorax fly. It uses a conventional wing and tail, but the wing and hackle are moved forward slightly to match those mayflies with forward attached wings.

    Conventional thorax flies use turkey flats for wings.


    Notice that the top of the flat is flat? That’s how the feather gets its name. This type of feather forms a nice wing with the tips of the wing being flat, just like in the feather.

    Thanks to Al Campbell!

    Happy Fly Tying!
    Ron

    Wednesday, August 02, 2006

    Split Tails

    Fan Tailed Gray Dun

    Using the
    basic dry fly we learned last time as a reference pattern, we will expand on that learned skill to fan tails and split tails. We’ll also tie our first wing this week. Each fly is a stepping stone to the next fly. Each fly will add a new dimension to your tying skills.

    I mentioned split tails last time. The advantage to split tails is increased buoyancy and balance. They also look a lot like the split tails that occur on mayflies. A twist on split tails is a fan tail.
    Our first fly this time will have a fan tail. Otherwise, it’s the same fly as the one we tied last time. We’re just adding to what we already know. You are also going to learn how to use a rotary hackle plier.


    Nothing matches a rotary hackle plier for speed and control once you’ve learned how and when to use one. I’ve tried several models of rotary hackle pliers and like the Griffin one far better than any of the others I’ve tried. It just holds the hackle better and rotates smoother than the rest. I believe I mentioned before that I’m a little unconventional at times.

    Last week you learned the conventional method of wrapping hackle. This week we’ll try something new. Rotary hackle pliers are a little unconventional. Our second fly this week uses a method of wrapping hackle that’s even more unconventional. Hey, don’t run away just yet; it isn’t all that bad. Like I said before, I’ll try to pass on several ways to do the same thing if I can. Who knows, you might like the unconventional methods more than the conventional ones.

    On with our first fly, a fan tailed gray dun. Of course, you can change colors to match a blue wing olive or Hendrickson if you wish; the steps remain the same. That’s the beauty of fly tying; you can often just change the materials to make a different fly. It will look different, but the steps used in tying it will be the same. Somehow, I think this puzzle just got a little easier to solve.
    List of materials: Fan Tailed Gray Dun

    Hook: Standard dry fly; Mustad 94840, Tiemco 100, Eagle Claw L059, Daiichi 1180. Size 10 - 22.

    Thread: 6/0 to 10/0 Gudebrod or equivalent, color to match body or black.
    Body: Angler’s Choice pure silk dubbing, mink under-fur, muskrat under-fur, or any other synthetic or natural fine dubbing. Color to match the body of the insect you want to imitate.
    Hackle: Quality neck or saddle hackle, webby parts removed and 1/16” of the remaining stem stripped of barbules. Color to match natural insect or any pattern you want to tie. (In this case, a gray dun.)

    Many Thanks to Al Campbell
    Happy Tying!
    Ron

    Monday, July 31, 2006

    The WoollyBugger

    Woolly Bugger and Montana Nymph


    We've worked with hackle, we've worked with chenille, let's take it another step. Each step we take adds to our skills and expands our knowledge of fly tying. The Woolly Bugger and Montana Nymph will continue that trend.

    The woolly bugger is often used as a streamer, but tied in the right sizes and colors, it makes a great crayfish, dragonfly nymph, egg cluster, salmon flesh or leech imitation. It's the one fly that has probably hooked more big fish and more species of fish than any other. Because it looks so edible to the fish, it consistently fools trout, bass, salmon, pike and walleyes, not to mention a host of panfish and saltwater species. You'll want to have a variety of these fish catching morsels in your fly box at all times. Add black, gold and copper beads to the head for a swimming action the fish can't resist.

    List of materials:


    Hook: Streamer 2xlong; Eagle Claw L058, Tiemco 5263, Mustad 9672, Daiichi 1720.


    Tail: Marabou - Black, olive, brown or any other color desired.


    Body: Chenille, any color you wish, but black, orange, brown and olive are most common.


    Hackle: Saddle or neck, saddle is preferred. Color to match the body if desired.


    Thread: 3/0, color to match body or black.


    Rib: Wire (gold, silver or copper).

    Tying steps:

    1. Tie a small bunch of marabou to the hook, length approximately the same as the hook shank.


    2. Tie in a ribbing wire.


    Thanks Again to Al Campbell and his great program.

    Ron


    Saturday, July 29, 2006

    Marabou Damsel Nymph


    For the months of June, July and August, the most common item in the stomachs of trout, bass (small mouth and largemouth), walleye and panfish like crappie, perch and bluegills was a mix of adult and nymph damsel and dragon flies. Yes, I said walleyes. And, the nymphs were still prominent in stomach samplings during the spring, fall and winter months. Reason enough for me to fish a damsel or dragon fly nymph on the local lakes.
    Even the biologists were surprised that fish noted as minnow eaters like walleyes, crappie and largemouth bass were eating more nymphs than minnows. Another thing that caught their attention was the number of northern pike that had a fairly large percentage of damsel and dragon fly nymphs in their stomachs. Seems these fish are opportunistic too.

    Why not? Dragon and damsel flies live in the weeds and grow to meal sized treats fairly fast. Fish like to look for food in the weeds, so why wouldn't they eat the most common big nymph in their dining room? Maybe the pike think of them as desert?

    With this in mind, maybe it's a good idea to have a few imitations of these two treats in your fly box. You might be surprised at how easy they are to tie. It only takes a few materials to do the job.

    Now, to the nymph patterns you panfishermen have been looking for.

    List of materials: Marabou Damsel:


    Hook: Nymph, 1xlong; Mustad 9671, Tiemco 5262 or 200R, Eagle Claw L063 or equivalent. Size 10 to 18.


    Thread: Gudebrod 3/0 black, brown or olive, or equivalent.


    Thorax: Marabou, same as body.


    Rib: Clear Angler's Choice Body Stuff, midge Larva Lace, V-Rib or equivalent.

    Wing Case: Strip of fibers from a turkey tail feather or pheasant tail feather. If you want some flash, you can use pearl tinsel for a wing case.


    Eyes: Pearl or black plastic craft bead string, brass bead chain or melted monofiliment.

    Tying steps:

    1. Start thread and tie rib material to the hook.


    2. Attach a pair of eyes to the front of the hook using a figure 8 wrap. (If the eyes turn a little on the hook, you can straighten them out by hand before you continue.)


    Note the size of the eyes!

    Make plenty of wraps to ensure the eyes stay firmly in place. A drop of super glue will help hold the eyes in place.

    Thanks again to Al Campbell for his expertise!
    Ron 

    Wednesday, July 26, 2006

    Hammerhead Attacks a Tarpon

    This was pretty amazing, I feel bad for the tarpon. This guy reeling the tarpon is an idiot in my opinon he should have cut his line to give the tarpon a chance!

    Tying with Reel Eggs

    Here's a brief rundown on how to use one of the hottest new fly tying materials for '06...Reel Eggs. Whether you choose the single egg or the cluster there is no egg that is easier to tie with or more realistic in look and feel (something like a gummy bear). Plus they come in a ton of colors to match your local needs.

    Step 1 Snip one egg off the string of 12 and trim the yarn core back to the surface of the egg.

    Step 2 Insert the point of the hook through the yarn center, then add a drop of zap-a-gap behind the hook eye. Now simply slide the egg forward to it's final position and let dry.


    Step 3 You can get real creative with this product and dub a small amount of Egg Veil ahead of it to represent a real 'fresh' egg, or tie behind the egg for amazing egg sucking leech patterns.
    Great information on a quick and easy fly.
    Ron 

    Saturday, July 22, 2006

    The Hackle

    One of the items we use in fly tying on many flies is hackle. Hackle is the fuzzy stuff on the front of most flies, especially dry flies.

    Depending on how the hackle is applied to the fly, it will help it float or help it sink. We'll look at the three most common hackle wrapping techniques this week. You'll see the difference, and what you learn this week will be used often in the weeks ahead.

    Hackle on a fly is created by wrapping feathers (usually from the neck or saddle of a rooster) around a hook.

    Most of the time when we refer to hackle, we are talking about the hackle on the fly, but sometimes we are talking about the feathers used to create the hackled effect. Since hackle feathers vary in quality and type, we need to look at some of the differences.

    You can buy hackle in several forms. Sometimes you'll find it sown together in a bunch. This is called strung hackle, and it is often of a poor quality for anything but streamers or woolly worms. Most of the time it is found on the skin, either in a neck or saddle form. This is usually the best quality hackle, but it can be defined more than that.

    Hackle feathers have several qualities that make them suitable for dry fly, wet fly or streamer uses. For dry flies, you want a long thin feather with short, stiff barbules and a flexible stem. For wet flies, the feather can have softer barbules, but they still need to be fairly short. For streamers, long, soft barbules are the best.

    Quality saddle hackles provide the best dry fly hackle, but are limited in the sizes of hooks that can be used. They are much longer than neck feathers and are more consistent in size from bottom to top. They have the highest barbule count per inch, and the barbules are stiffer than those found on a neck feather.

    Al Campbell has all the right information Listen to him!

    Ron 

    Thursday, July 20, 2006

    Hare’s Ear


    The Hare’s Ear is a good pattern to imitate a caddis larva case or a mayfly nymph. Don’t stop there though, it also does a good job imitating a stonefly nymph or damsel fly nymph. I guess it’s success is due to the fact it doesn’t look exactly like anything, but it does look a lot like everything in the nymph world. Add the fact you can use dyed hair and synthetic fibers in the dubbing mix, and you can produce a nymph that looks like almost anything.

    That’s right, I suggested substituting materials. These are basic, standard patterns, but you have the freedom to alter them to meet your needs. That’s why so many people take up fly tying in the first place; they can create flies that better fit their needs by changing a standard pattern a little. You are in control here. It’s your fly, and you have the freedom to make it any way you want to, as long as you aren’t tying for commercial purposes. (Commericial tyers must consistantly produce the same fly the buyer ordered.) So get creative if you want, you might be surprised by the results.
    Al Campbell has the right ideas when it comes to Fly Tying! Pay very close attention to all he has to say.
    Ron 

    Tuesday, July 18, 2006

    Tailwater and Spring Creek Favorites


    If you live in an area that has spring creeks or tailwaters, you likely live in an area that has scuds. You also are likely to have a lot of midges in the streams, especially in fall, winter and spring. Unless you’re a dry fly purist, you’ll want to have a few of these goodies in you fly box.
    Before we start on the flies, it would be a good idea to discuss dubbing a minute. Dubbing is what we call the stuff you twist around the thread to make fly bodies. We’ve already used some pre-packaged dubbing, but we haven’t created any of our own. It’s easy to create your own dubbing though. All you need is a coffee grinder or a blender and some fur or yarn. You might also find a little good dubbing in your clothes dryer screen after you wash a throw rug or wool coat or sweater. Just remember, cotton is not a good type of dubbing.

    If you set out to make your own dubbing, first you need some raw materials. Macramé yarn, sparkle type knitting yarns, animal under furs, carpet yarns, poly yarn, dacron, antron and rayon all make good dubbing materials. For fine dubbing, the under fur of some animals is a good choice. Mink, beaver, muskrat, opossum and rabbit fit this category. For coarse dubbing, yarns (especially the course type), short hairs from the ears, feet and face of certain animals, antron, krystal flash and wool are good sources.

    Experiment a little and you’ll open up a whole new arena of materials you can use in your tying. A good example of what I’m talking about is the scud pattern we’ll tie this week. The dubbing is a coarse macramé yarn I cut into short pieces (about 1/4 to 1/2 inch) and toss in the blender and mix with sparkle yarn from the fabric store. I keep adding yarns until I have the right color and texture blend for what I want to tie. Stop by a few yard sales for an old blender and some macramé or knitting yarns and give it a try.

    On to this week’s flies.

    Scuds are not flies but rather crustaceans of the amphipod family. Their closest relatives are beach fleas you might find on the coast somewhere, but they belong to the broad family of crustaceans that includes crayfish, lobsters, sowbugs, crabs and shrimp. They are often called freshwater shrimp because they resemble shrimp in many ways. If you care to count, (the fish never do) they have seven pairs of legs and swim with a short, jerky sideways motion.

    Al Campbell - Thanks
    Ron

    Sunday, July 16, 2006

    Swept hackle, wingless, all purpose fly


    If you could only have one fly pattern in your fly box, what would itbe? Would you choose a dry fly or a nymph?

    If that pattern could be modified to matchmany insect hatches, or if it could be fishedas a dry, wet, nymph or streamer; would it bemore likely to be your pick? What if someonedesigned a fly that would fit almost all occasions with only a slight modification in size, hook or materials, but the tying stepsremained the same? Would that earn this fly a place in the hallowed halls of your fly box?In my case, it earned this fly the right to its own fly box.


    This pattern was featured in the fall 1998 issueof Fly Tying Magazinefrom Frank Amato Publications. It’s called a SHWAPF(swept hackle, wingless, all purpose fly). It’s asimple fly to tie and a simple fly to fish. You canchange any number of materials to change the looks andattributes of the fly and still tie it with the same simple steps. It can be a salmon fly, a dry fly, a wet fly, a streamer or a nymph depending on the length, sizeand style of hook or the materials used.

    You can add a bead head, change the body materialsor hackle materials and still use the same simplesteps to tie a shwapf that looks very different than the one you tied the last time. That’s thekey to this simple fly, it’s adaptable enough to match almost anything you want it to match. That’swhy it’s called an all purpose fly.

    I first designed this fly to chase brookies in my native Montana waters. It was so easy to fillmy fly box with fish catching flies in verylittle time, that it became a favorite of mine. That gave me more time to fish and freed me from the tying bench more often. I like that idea! Need a caddis, mayfly or ant imitation? I’ve used the Shwapf for all of them. Royal Shwapf? Yup, that one too.

    As always Al Campbell - Thanks!

    Ron & Beth

    Saturday, July 15, 2006

    Fall Midge Emerger


    As we progress in this series I will assume you have mastered the steps in the previous lesson. For instance, I won’t show you how to start the thread, whip finish the fly, the loose wraps needed to begin tying down a material to the hook, or how to tie that material down. If it’s been covered, we won’t waste the time to cover it again. This will allow us the time and space to progress at a faster pace, and allow you to learn more from this series.
    This week we’ll learn how to dub a body and attach a down-style wing. Most beginners use too much dubbing, don’t wrap the dubbing tight enough or use way too much hair in a wing. The key to successful dubbing is to keep it thin and tight around the thread. Practice makes for a perfect fly, so practice these steps until you have them mastered. If you need to, use a razor blade to strip the hook and start over. This is a building block to the rest of the series and you must master these steps before you can progress to the rest of the flies.
    On with the series.
    Midges are a significant part of the diet of fish (especially trout) in lakes and streams. This tiny insect hatches all year, often hatching in the warm micro-layer of air just above the water’s surface even in sub-freezing temperatures. Even in the summer when many hatches occur on a daily basis, trout and panfish will zero in on the midge as the main source of their daily protein. For this reason it’s a good idea to have a few midge patterns in your fly box.
    Midges are usually very small, but some hatches, especially in lakes, the midges can be as big as a size 12, although most will be size 16 or smaller. Start tying this pattern in a size 16 and work to smaller hooks as your abilities grow. It’s a good idea to have this pattern in sizes 16 to 22 if you want to be able to match the hatch in most of the circumstances. I tie it in colors that range from brown and tan to cream and light yellow. It’s not a bad micro-caddis pattern either.
    List of materials:


    Hook: Eagle Claw L061B, Tiemco 100, Mustad 94840 or equivalent.
    Dubbing: Anglers Choice pure silk, tan mink, or any extra fine dubbing.


    Rib: Anglers Choice Super Floss, black horse hair, small black nylon.
    Wing: Small cluster of pine squirrel tail hairs or similar hair,antron.
    Thread: Tan, brown, cream or black. I prefer Gudebrod 8/0 or 10/0.

    Thanks to Al Campbell for this series.

    Happy Fly Tying
    Ron 
    technorati tags:, , , , , ,

    Friday, July 14, 2006

    The EZ-Nymph


    As I promised last week, it’s time to tie our first fly. First we need to look at the traditional way you will see flies listed in fly tying books. If you know how they are usually presented, it will be easier to pick out the key things you need to know.

    First, there is usually a narrative that describes something about the fly and how or when to use it. Next, there is a list of components used in the fly. Then you’ll probably see a short list of tying steps, sometimes assuming you know a lot about fly tying. Finally, there is often more narrative about the fly and how it is useful.

    Since I tend to be a little less conventional, you might not see this series of events listed this way in my fly tying series. Don’t worry, it isn’t written in blood anywhere that you must do things the conventional way. Just kick back and enjoy, it’s about to get fun.

    List of materials:

    Mustad 3399A or 3906B hook or equivalent Size 10 to 16.

    Pheasant tail feather - A long one from the center of the tail, can be dyed.

    Black 3/0 or 6/0 thread.

    Tying steps:

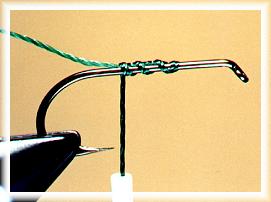
  • 1. Start the thread on the hook. You did this last time, so I won’t go into detail again.

  • 2. Pull about 12 strands of feather fiber from a large pheasant tail feather. Since length is important, be sure to get these fibers from the upper 2/3 of the feather. Trim the base of feather stem material.

  • Thanks again to Al Campbell.
    Ron & Beth

    technorati tags:, , ,

    Thursday, July 13, 2006

    Thompson Whip Finisher

    The Thompson style whip finisher ties the same knot the other whip finishers do, it just does it a little differently. This is a little more difficult tool to learn to use, but just as important a tool as the other style of whip finisher.

    Thompson style whip finishers are best suited for work in small confined places. If you’re trying to tie a whip knot on a small dry fly and don’t want to tie the hackle down, this is the right tool for the job. This is the best choice of whip finishers if you’re using a hackle guard to hold the hackle out of the way.

    This type of whip finisher isn’t very suitable for flies with bead heads or bullet heads. It won’t maneuver around jig heads or lead eyes. It isn’t suitable for flies that must be whip finished back away from the hook eye. It is the best whip finisher to use on hair heads and small hackled flies, because it won’t bind the hair or hackle down like a Matarelli whip finisher will.

    Again, Thanks to Al Campbell for the great tips!

    Ron & Beth

    To start a whip knot with the Thompson style whip finisher, hook the thread between the fly and the bobbin with the arm of the whip finisher. With the open end of the s-shaped bend on the end of the whip finisher, hook the thread as it comes off the fly. Then lay the thread from the bobbin in the dip of the s-shaped bend nearest the arm of the whip finisher.

    Wednesday, July 12, 2006

    Whip Finishers

    Whip finishers are probably the least used and least understood, basic tool in the average fly tyer’s arsenal. This is the tool that creates the nice knot at the head of the fly that keeps the fly together. If your flies fall apart, it’s most likely due to the whip knot you didn’t do or didn’t do right when you finished the fly. Some fly tyers use their fingers to do a whip finish knot. Although this often provides an acceptable knot, it sometimes provides an un-acceptable knot. Since learning to use a whip finisher is one of the basic skills of fly tying, I’ll show you how to use the tools right. I won’t show you how to do a whip knot by hand, at least not until the series is over, and maybe not then. I’m convinced that this is one skill you must learn to do right to be as good a tyer as possible. There are two main styles of whip finishers. One is the Matarelli and the other is the Thompson. (You might see a simple whip finisher; it functions the same as the Matarelli.) While I’m not certain of the origins of these tools, I think it’s reasonable to assume they bear the names of their inventors. Both styles can be used on a variety of flies, but each style has specific benefits when used on certain types of flies. This week we’ll learn how to use the Matarelli whip finisher. This is the easiest of the two whip finishers to use. It can be used on a variety of flies, but it is much easier than the Thompson to use on bullet head, jig head, bead head, cone head and foam head flies. Any time you need to create a whip knot back away from the hook eye, this is the tool for the job.
    Starting Thread

    Again Al Campbell has all of the right information with the easiest to follow instructions.  Keep looking for more of his fly tying ideas right here.  I found that they are the best.
    Ron

    technorati tags:, , , , ,

    Tuesday, July 11, 2006

    Fly Tying Tools

    There are a lot of tools that pertain to fly tying. It’s amazing how many tools you can find that are supposedly the "greatest fly tying tools you’ll ever use", but when you buy them, you can’t find a use for them. I’ve got a drawer full of "great" tools that don’t work as advertised. It’s pretty easy to get duped by a nice looking ad or a salesman trying to unload a slow moving product. There are also a bunch of tools I couldn’t do without. Let’s take a look at the essential ones.

    One tool you’ll use every time you tie a fly is a bobbin. This little gem holds the thread and keeps tension on it while you tie the fly. It has a small tube (some are larger than others) that the thread runs through. Thank God it’s smaller than my fingers, or I’d never get a small fly tied.

    Bobbins
    Bobbins come in a variety of sizes and shapes, but they all perform the same duty. Some have ceramic tubes the thread runs through, others are just stainless steel. Some are flared, some are straight at the end of the tube, and some have mysterious bends in the frame designed to make them easier to hold. Some have ceramic or jeweled inserts on the end of the tube and some have springs that reel up the slack thread while you use them. Good bobbins never cut the thread and cheap bobbins almost always cut the thread, so it’s wise to invest in a good bobbin or two. One thing they all have in common; they all hold the thread and have a small tube that makes it easier to direct the thread to the right place on the hook. I have over a dozen ceramic bobbins pre-loaded with thread on my fly tying desk at all times.

    Thank God for tools like these that makes fly tying that easy
    Ron

    Monday, July 10, 2006

    Fly Vise


    Perhaps the most important tool you’ll use in fly tying is the fly vise. If you look in fly fishing magazines, you’ll have an opportunity to seeplenty of advertisements for lots of different fly vises. It can getconfusing just trying to sort out the features you need from the ones theysay you need. So, what’s the bottom line? What features are important ina fly vise?
    First, a good fly vise must hold a variety of hook sizes and shapessecurely. It isn’t enough to hold just a few sizes or shapes well, it musthold them all. If the vise won’t do that, don’t buy it. That’s the mostbasic and important requirement.
    The jaws of the vise must be positioned or be able to be positioned at anangle that allows you to tie flies of various sizes with it. Some viseshave jaws that are too big to use with a variety of hooks. Others don’thave the jaws positioned at an angle that allows the tyer to work withsmall hooks.
    Look for a vise that has jaws positioned at an angle that allows you towork around and with the smallest hooks you might someday use. That mightbe size 28, so check to see if the vise will hold this size hook securelywhile allowing complete access to the main length of the hook shank.


    Choosing the right vise is very important. Take your time.
    Ron & Beth


    technorati tags:, ,

    Fly Fishing Camp For Free

    Hey Kids...Do you want to go to Camp for Free?

    Fly Fishing & Tying Journal and the Fly shop in Redding , CA want to send you.

    Fishcamp is a 4-night, 5 day fly fishing adventure at Antelope Creek Lodge in the shadows of beautiful Mt. Shasta in Northern California. Antelope Creek is the home of the Fly Shop's Kids Camp and Fly Fishing Schools.

    You will learn fishing techiques and strategies, basic bugs trout like to eat, safe wading, fly cast and reading the water. In the evenings you will learn how to tie and create your own flys. There will be stories and s'mores by the campfire.

    If this sounds like fun to you...all you need to do is write a 100 word essay on why you want to go to Fishcamp. The staff will pick two winners and each winner will get their photograph and essay published in the magazine, which is read around the world. How cool is that?

    FTJ & The Fly shop provide accommodations, meals, and equipment. You will need to bring clothes, sleeping bag and transportation to the camp.

    Send your essay to:
    Flyfishing & Tying Journal
    PO Box 82112
    Portland, Oregon 97282

    Any questions you can call Dave Eng or Julie DeLorto at 1-800-541-9498

    Fish camp is for boys and girls ages 10 - 15. This prize is worth $750.00.

    Good Luck!
    Ron & Beth

    Sunday, July 09, 2006

    The Hook

    Beginning Fly Tying - Part 2


    Streamer Dry Hooks
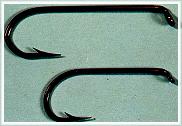
    You need to make sure that you have the right hook in order to make a proper fly. Al Campbell really has all the right information.

    It seems strange that I’d start looking at equipment by looking at hooks. After all, there are many other important things to consider like vises, bobbins, scissors, etc. to look at.

    So why hooks? Well, hooks are the things that hold the feathers, fur, hair and other fluff you use to create a fly. Hooks are designed for specific purposes. If you choose the right hook, your fly will be better proportioned and thus perform better in use. If you choose the wrong hook, you’ll have a flawed fly and your success with that fly will likely be less than the success you would enjoy with a properly tied fly.

    I won’t spend a lot of time on barbed vs. barbless hooks. You’ll have to decide the direction to travel there. After all, a simple squeeze from a small pair of pliers will turn a barbed hook into a barbless one. Rather than concentrate on hook design, I’d like to spend as much of this time as possible working toward tying quality flies. However, you’ll need to know what the basic parts and shapes of a hook are if you’re going to succeed in tying your own flies.


    Ron & Beth

    Saturday, July 08, 2006

    Fly Tying for Beginners

    An Introduction to Fly Tying


    The normal evolution a fly fisher goes through usually includes fly tying sometime after the first year or two. Some take up fly tying to cut the costs of all the flies they seem to leave in bushes and trees everywhere they go. Others want to try it to increase their involvement in the finer details of the sport. No matter what your reasons are, tying flies seems to be an integrated part of the whole fly fishing picture.
    There have been perhaps more volumes of books and articles written on the art of fly tying than any other aspect of fly fishing. If you subscribe to any of the fly fishing magazines, you have encountered articles that included fly patterns. In fact, a few magazines are dedicated to the art of fly tying. Those magazines will enhance the information you find here and I encourage you to consider subscribing to one or two.

    The first thing you need to know about tying your own flies is a little bit about the flies themselves. Some of you will probably know this information, but there are a few who don’t; so I’ll give you a refresher course.
    Thorax FlyCDC Baetis
    Dry flies are simply flies that float. They usually represent adult insects that are emerging (breaking out of their nymphal shuck), drying their wings so they can fly away, or returning to the water to lay eggs.
    Since dry flies are the most fun to use (you get to see the fish take the fly), more fly patterns have been designed as dry patterns than any of the rest. Although some folks separate emerger flies from dries, since they usually float, I’ll include them with dries.
    Thanks Al Campbell for the great instructions.
    Ron

    Book Review - Salmon Flies

    Salmon flies - Their Character, Style and Dressing


    cover

    To review this book is like kicking in an open door - a door, which was opened a few decades ago. So many people have praised it before me, and its influence has been so phenomenal that anything but a Global Class score would make little sense.

    The impact of Poul Jorgensen contemporary salmon fly tying – or rather contemporary salmon fly tiers - is massive. His book brought the craftsmanship and art of these gaudy yet practical and beautiful full dressed salmon flies to the attention of a whole generation of new tiers.

    In 1978 when this book first came out I was in the transition between college and university and had barely started my “career” in fly-fishing and fly tying.
    But I met Poul Jorgensen.

    Since he was born in Denmark he regularly returned to visit friends and family. During his stays he would often teach classes or perform tying demonstrations, and I had the good fortune of seeing him on several such occasions.

    Friday, July 07, 2006

    The Most Effective Flies

    Fly Fishing Book Review by Bob Triggs


    "Trout don't speak Latin"...such a seemingly simple truth. Yet no serious fly fisherman, who has studied the bugs that trout prey upon, has not at some point encountered the great divide of Latin taxonomical references in aquatic entomology- right down to counting the filaments on a mayfly nymph's gills. For most of us it is a daunting moment. When Dave Hughes released the first edition of his Handbook of Hatches it was welcomed not only for the signature completeness in presentation, but for the author's simple approach to solving the flyfisherman's riddle of insects, hatches flyfishing and catching trout. Dave gave us permission to call a little brown bug... well; "A little Brown Bug". And we still learned something about the hatches that particular bug represented , and we caught more fish because of it, without having to learn a foreign ancient language to do it. (In the end we knew it's real name too.)
    But this is not to dumb it all down- it merely makes serious study more possible and approachable. By working through this book, and learning Dave Hughes method of on-the-water trout forage identification, most anglers will undoubtedly come away with a few new latin names for bugs under their belt. You will just have more fun doing it and with a lot less formidable a teacher. For any thinker on trout this book will add a breadth of knowledge to their understanding and enjoyment of the game. This book is a bridge to the fascinating study of aquatic entomology for anyone who ever felt intimidated by that subject.
    In this revisit of that same work it is refreshing to find so much of the first book still forming the structure of the new one, yet with some significant advances. Most subtly Dave includes a short list of "Axioms" at the beginning; nine rules to approach your best match-the-hatch trout flyfishing on. This sets the reader on a firm path toward a method of identification and understanding of trout prey in it's many stages of life and availability as forage in the water. I would suggest looking at that foundation list of "Axioms" often, as a guide along the route. Not to be missed are Dave's supportive commentaries on presentations and strategies for the different flies and fishing situations, including stillwater presentation. The new book features excellant full-color photography by the author, including some on-the-water scenes, and many very clear, helpful close up shots of the naturals right alongside their imitation fly patterns. Dave made sure to update the many listed fly patterns as well- with tying recipies. For those of us who tie our own this detail alone will be a Godsend. You will find Handbook of Hatches most helpful in your tackle bag all season.
    Great Review!

    Ron

    The Perfect Question...

    What is A Fly?

    This Article answers the "Perfect Question" for all the new Fly Fisherman wanting to learn to tie their own flies. Thanks Don Johnson for all the great information.

    What is a fly? Is it merely a conglomeration of materials bound to a hook and designed to bamboozle a fish? Yes and no. For many, a tied fly is a commodity purchased so we can enjoy the sport and challenge of fly fishing. For others, through the art and craft of fly tying, a fly becomes a means by which they elevate their respective participation to a higher plane, which offers its own gratification. Some see it as an all-consuming religious pursuit requiring copious hours spent paying homage to the masters of yore through the meticulous study of their methods and techniques which then are manifested in glorious patterns likely never to see one drop of hydration. What follows is but a few samples of what denominations are available to those fitting the latter category of tiers:

    The First Rotational Congregation of the Church of the Fly is an Anglerican denomination of Rotarians committed fully to the promotion of the benefits and techniques of tying flies in the true rotary fashion. Some believe Norm Norlander is the Prophet behind this particular movement although Guido and Guiseppi Mercedes-Benzetti may in fact be playing a much less significant role behind the scenes.

    The Seven Day Apprentice church promotes the preservation and use of the venerable Thompson A vise. This church is very basic and really stresses old-school methods practiced daily throughout the week as a general form of education for those wishing to take up the craft as a future form of income. This church is often confused with the Seven Gay Apprentices which is actually a rogue band of fledgling interior decorators under the inspiration of the hit TV show "Queer Eye for the Straight Guy".


    Ron & Beth

    Thursday, July 06, 2006

    Simplified Stingers

    The Art of Articulation

    This is great information, thank you Don Johnson.


    Tandem flies fill a definite niche in the many disciplines of fly angling. The major deterrent associated with tandems from a tying point of view stems mostly from the fact that they can be laborious, time-consuming productions. In my search for a satisfactory, fast method of manufacturing a tandem hook setup for commercial application, I came across numerous techniques, none of which resembles that which I will later describe. All of the techniques encountered during my search were ones that I had tried, disliked and wouldn’t employ because I considered them too labor-intensive. In my quest simplify the tandem-fly chassis in general and the stinger (rear hook) connection in particular, I joined a stinger to a lead hook in a way that is simple, versatile and adaptable. The beauty of this method is that the coupling of the stinger hook to the connecting material requires no tools (usually), no knots, no thread and no glue. All that is needed is a hook (either up-eye or down-eye) and about 12 inches of connection material, which will be examined later in greater detail. Of course, as with everything else I have encountered in fly tying, there is not much in the way of technique that is new or earth-shattering. I rambled on, (re)inventing the wheel at my own pace completely oblivious as to this technique’s existence. As it turns out, this method had already been developed, just not publicized in literature or known to me. A gentleman named Don Ordes mentioned that he first used this technique about 15 years ago. He, like myself, was not shown or introduced to the technique but just happened to stumble upon it, refine it and adapt it as necessary to suit his angling needs. His needs happen to be a lot more demanding than those of mine. Don’s furled tandems have held 150+ pound billfish. That should be clear evidence that the connection is quite strong.

    Ron & Beth

    Wednesday, July 05, 2006

    US Represented in World Championships

    http://www.lockhaven.com/express/News/articles.asp?articleID=3128
    The Express

    Very Cool!! A local Fly Fisherman is going to Portugal for the World Championships in September. Check back again then and we will keep you updated on his progress!


    LOCK HAVEN — Fly-fishing in the little town of Germania as a young boy with his mother driving him to all the best fishing holes, George Daniel never imagined he’d someday be considered among the top fly-fisherman in the country. Now years have gone by and Daniel, 27, is training for a trip to Lisben, Portugal, where he will be one of five anglers representing the United States in the World Fly-Fishing Championships. He and his teammates will be competing against 23 other countries in the competition, which is often regarded as the Olympics of fly-fishing.

    Thanks to Scott Kulah of The Express

    Tuesday, July 04, 2006

    How to tie a Feather Fleye Squid

    http://www.flyfishinsalt.com/article.jsp?ID=39252


    This may not be a beginners project, but it is one of the most fascinating baits!


    MATERIALS HOOK: 2/0 Gamakatsu SP11 3L3H or equivalent long-shank hook
    THREAD: Fine monofilament
    HEAD AND TENTACLES: Long white bucktail
    BODY: Light pink strung hackle
    EYES: 80- or 100-pound mono and two 1¼2-inch silver prismatic stick-on eyes
    GLUE: Cyanoacrylate or head cement

    Tying Instructions Step 1: Prepare 80- to 100-pound mono by flattening about half inch of it, and press two stick-on eyes, back to back, onto the mono. Use a drop of glue to secure. Cut the mono so that it's about half inch longer than the hook and flatten the last half inch. Beginning about halfway down the shank, wrap a layer of thread back to the bend and then tie the last half inch of the mono to the hook.


    Many Thanks to Bob Popovics for these instructions.

    Ron & Beth

    Top Fishing Spots

    http://www.ntxe-news.com/artman/publish/article_35239.shtml

    Great information for all of the folks out in Arizona that love to fly fish!


    The top fishing spots right now are Powell and Mead for stripers, Roosevelt or Alamo for largemouth bass and Pleasant for white bass and striped bass. Haven’t heard much from Bartlett anglers, but it should have good action as well.

    For most lakes, fishing at night is the key. We are in the first quarter of the moon, which means it’s a great time to attract plankton, shad and predatory fish to submerged lights. Be sure to catch the twilight action at dawn and dusk, especially using topwater baits. The top crappie spots are Alamo and Roosevelt. Live minnows or shad should pay big dividends. If you don’t catch any crappie in an hour or so, find another spot. Pleasant should be super for white bass, striped bass, largemouth bass and in the right spots (northern coves over submerged brush), crappie.


    Special thanks to the Arizona Game and Fish Department for this wonderful information.


    Beth & Ron

    technorati tags:, ,

    Monday, July 03, 2006

    Learn How to Tie Flies to Enhance your Fly Fishing Experience

    http://www.creeksideangling.com/

    Just found this awsome book to help the beginner...Umpqua Beginner's Fly Tying Kit

    It is not difficult to tie flies, nor should it be expensive to learn how to tie properly. Many beginners make the mistake of buying a large assortment of tools and materials, or, a fly tying kit with a colorful array of odds and ends which do not do a specific job. When you learn how to tie flies there should be a purpose. Namely, to tie the flies that will also be effective when fished. The booklet included with the Beginner's Fly Tying Kit describes how to tie four types of flies (Dries, wets, streamers and nymphs) which you will be able to use during the fishing season. Each of the patterns has been specifically selected so that you can go on to other patterns in the category with little difficulty. The requirements you will need shall be basic. If, after you have mastered certain fundamentals, you wish to purchase other tools and materials by all means do so. For now, all you will need are included in the Beginner's Fly Tying Kit. The Kit includes: Instruction booklet, fly tying vise, bobbin, hackle pliers, scissors, sample fly patterns, assorted Tiemco hooks, head cement, tinsel, floss, tying thread, assorted chenille, peacock, Metz Dry Fly Hackle, assorted marabou, mallard flank feathers, deer body hair, strung saddle hackle, assorted dubbing, calf hair, turkey quill, and bucktail pieces.

    Many thanks to the people at CreeksideAngling for providing this resource.

    Ron & Beth